How to activate Snipping Tool Pro Features
To activate the Pro features of the Free Snipping Tool, open the application and navigate to the settings or menu options, typically represented by three dots or lines. Look for an option like “Upgrade to Pro” or “Activate Pro Features.” Click on it and follow the prompts, which usually involve entering a license key or purchasing. Once completed, the Pro features will be unlocked, offering advanced functionalities such as enhanced editing tools, cloud storage integration, and more customizable shipping options. If you encounter any issues, refer to the support section of the application or the developer’s website for assistance.
Step1: Buy key from this page
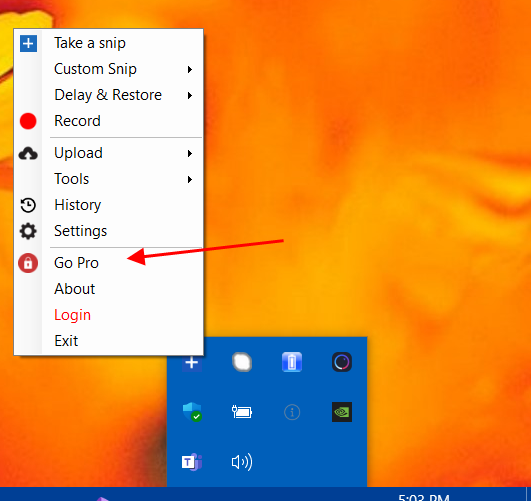
Step2: Open activation form.
Step2: Open activation form.

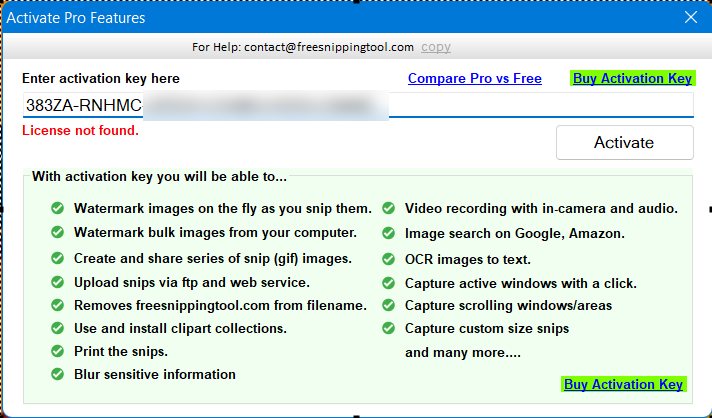
Step3: Copy key and click Activate button and wait.

Step4: Wait for this to activate your software, then exit and restart Free Snipping Tool.

Step5: Now restart app and confirm activation in Settings>About.

Follow the steps in this video to activate the pro version.
Related Posts
- Documentation
- Snipping tool download and install
- Create screenshots with snipping tool
- Add Watermarks on Snips
- Read text from images with Snip to OCR
- How to activate Snipping Tool Pro Features
- How to take custom size snips or fullscreen screenshots
- Log Errors in Snipping Tool
- Windows 11 Snipping Tool
- Fullpage Screen Capture
- Chrome Browser Integration
- Microsoft Edge Integration
- Android App - Screen Recorder with Audio
- Mozilla Firefox Browser Integration
- Opera Browser Integration
- Keyboard Shortcuts
- Keyboard Shortcuts
- Start Snipping Tool from within Browsers
- Change default installation path
- Create Photo Collage
- Create Desktop Shortcuts